We’ve all had those moments—browsing Instagram or TikTok, spotting a ripped trainer crushing a core routine that seems super easy. You think, “I can do that,” drop to the mat, and bam: your neck cramps, your lower back protests, and you’re flopping around like a fish out of water. For me, that nightmare exercise was the dead bug. It promised killer abs and a stable spine, but instead, it left me frustrated and sore. As someone who’s passionate about fitness, bombing at something so “basic” was a real ego bruise. And let’s be real—no one shares the beginner hacks or tweaks for when it hurts.
Then life threw a curveball: a slipped disc that knocked me out of the game. After some meds to ease the sharp agony, my midsection felt like jelly—weak and wobbly. Suddenly, nailing the dead bug wasn’t about aesthetics; it was essential for everyday movement without that nagging sciatica flare-up. My physical therapist became my hero. She didn’t push me into advanced stuff right away. Instead, she laid out a simple, step-by-step plan to rebuild from scratch. If you’re dealing with back issues, just starting out, or dreading how the dead bug exercise strains your spine, these dead bug modifications are your ticket to success.
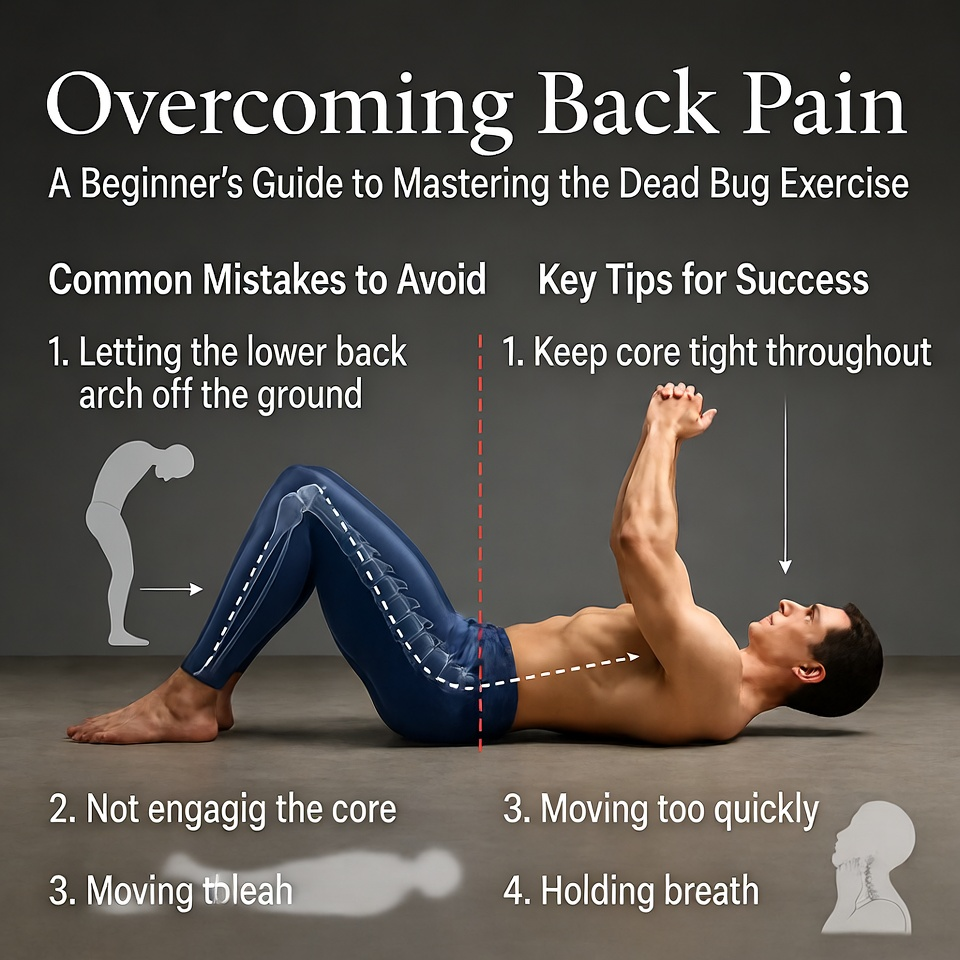
The Ideal Dead Bug Exercise (And Common Mistakes to Avoid)
Before diving into fixes, let’s break down what the standard dead bug exercise should look like. This core exercise for bad back relief is all about control and stability.
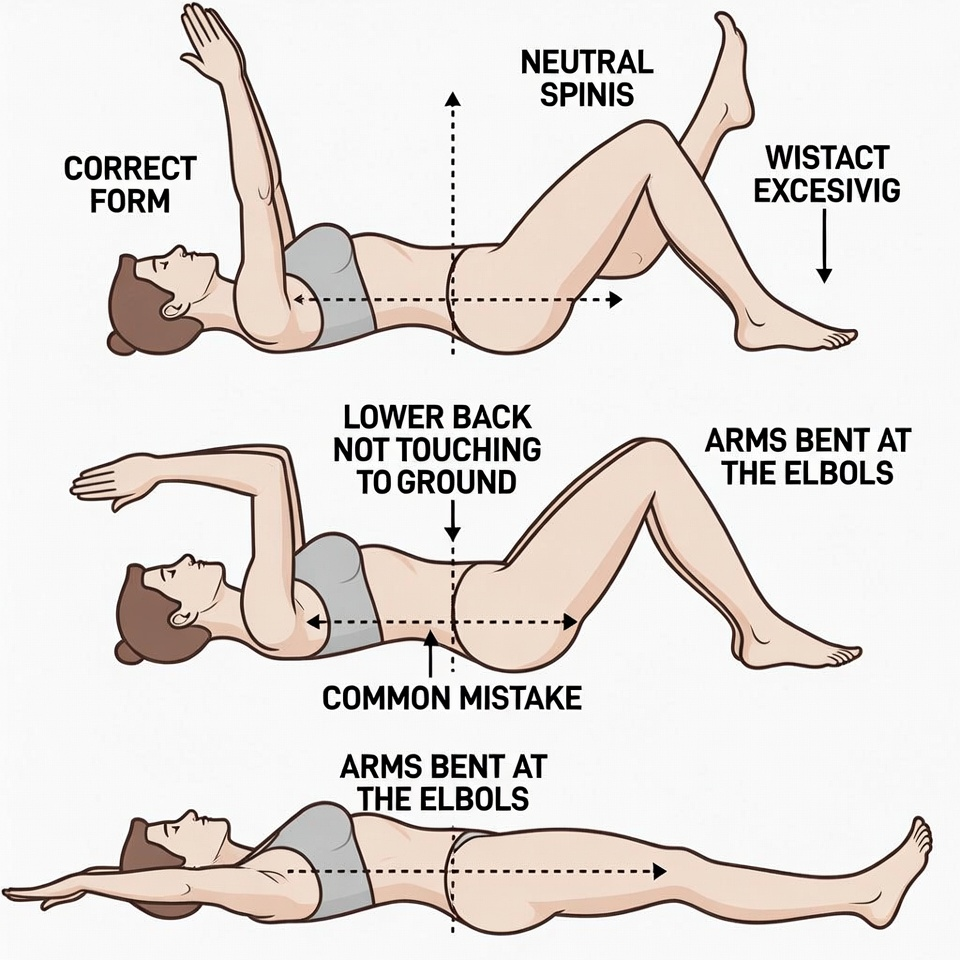
- Starting Position: Lie flat on your back. Bend your knees to 90 degrees so your thighs are perpendicular to the floor, and extend your arms straight up toward the ceiling.
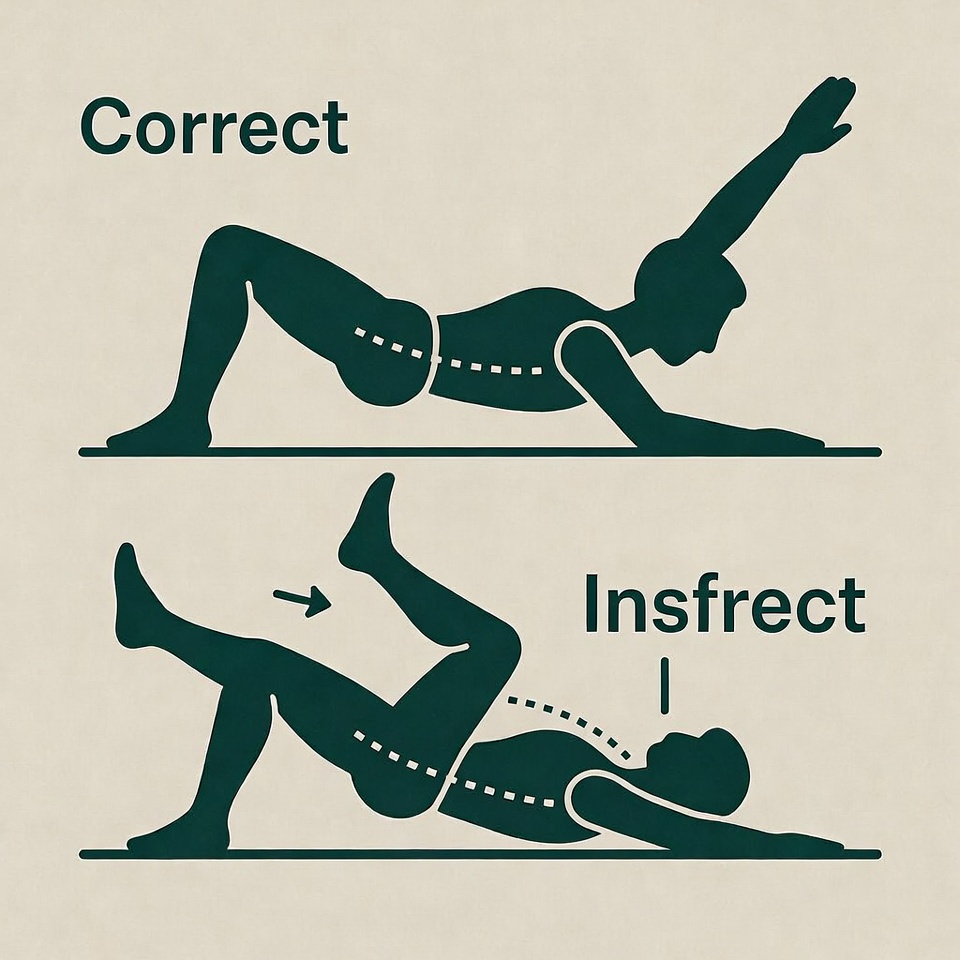
- Core Engagement: This is crucial—flatten your lower back against the mat. Pretend you’re squishing a fragile berry under your spine to keep that neutral position.
- The Movement: Gently lower one arm overhead while straightening the opposite leg out in front. Hover them just above the ground without touching.
- Reset: Return to the start and alternate sides smoothly.
Watch Out For: If your lower back lifts off the mat, that’s a big no-no. It means your core isn’t firing properly, leading to strain and potential injury. If this happens during your dead bug workout, dial it back with easier variations pronto.

Dead Bug Core Exercise – Protect your low back with this
My Journey to a Stronger Core: 3 Progressive Dead Bug Modifications
Here’s the phased approach that transformed my fragile midsection into a powerhouse. These steps focus on building core strength for a bad back without overwhelming your body.
Phase 1: Heel Drops (The Foundation Builder)
This is where I began—perfect for beginners or anyone with back pain. Skip the arm action if leg control alone is tough.
- Setup: On your back, knees at 90 degrees. Arms stay down by your sides, palms flat for extra support.
- Execution: Lower one heel toward the floor slowly, keeping the knee bent, then lift it back up.
- Benefits: Shortening the leg’s reach minimizes stress on your spine, letting you zero in on maintaining that flat-back contact.
Quick Tip: If arching still sneaks in, only lower halfway. Prioritize form over full range in this dead bug variation for beginners.
Phase 2: Resistance Band Challenge (Building Intensity)
Once heel drops felt solid and pain-free, we amped it up for better engagement.
- Tools Needed: A mini resistance band loop.
- Setup: Place the band around your feet’s arches, knees at 90 degrees as before.
- Execution: Do your heel drops or full leg extensions, pushing against the band’s pull.
- Benefits: The resistance activates more muscles, like hip flexors, creating a ripple effect that tightens your core automatically for superior stability.
Phase 3: Back to Basics (The Full Dead Bug Return)
With consistent practice, my core gained confidence. I gradually added arms back in, easing into the classic dead bug exercise with mindful control—no more wild swings.
Craving a Challenge? Once you’re acing the standard version, spice it up with these advanced dead bug variations:
- Add Weight: Grip a small weight in your hands during leg moves to boost resistance.
- Upper Ab Twist: Slightly raise your head and shoulders off the mat for extra upper core burn while extending limbs.
Conclusion: Embrace Patience for Lasting Core Strength
The dead bug exercise might seem straightforward, but it’s tough—and that’s okay. If you’re battling it, don’t give up. Conquering core exercises for a bad back is a marathon, not a race. Ditch the pride and view modifications as smart strategies, not shortcuts. Tune into your body’s signals; if pain creeps in, regress without shame. By sticking to this dead bug progression, you’re not just working out—you’re forging a resilient core that safeguards your spine long-term.
Frequently Asked Questions (FAQ)
How can I tell if my core is properly activated in dead bugs?
Rest a hand on your belly. As you breathe out and press your back down, it should firm up without bulging. Maintain this brace while breathing normally.
Why does my back ache during the dead bug exercise?
Pain often stems from core fatigue, causing your pelvis to tip and your back to arch. This shifts stress to your spine instead of muscles. Switch to heel drops until you can keep your back flat.
How frequently should I practice dead bug modifications?
Aim for 3-4 sessions weekly for rehab or foundational building. Begin with 2-3 sets of 8-10 reps per side, focusing on slow, controlled moves.
Is the dead bug safe with a disc herniation?
It’s commonly suggested for back problems, but always check with a healthcare pro first. If approved, start with Phase 1 to avoid worsening symptoms.
Do I require gear for dead bug workouts?
Nope, it’s bodyweight-friendly. That said, a budget-friendly mini band in Phase 2 can ramp up the challenge effectively.